Hello everybody, it’s me, Dave, welcome to our recipe page. Today, I will show you a way to prepare a distinctive dish, flat bread. One of my favorites food recipes. This time, I am going to make it a little bit tasty. This will be really delicious.
Flat bread is one of the most popular of current trending foods in the world. It’s enjoyed by millions daily. It is easy, it’s quick, it tastes yummy. Flat bread is something which I’ve loved my whole life. They are fine and they look wonderful.
A flatbread is a bread made with flour, water, and salt, and then thoroughly rolled into flattened dough. Many flatbreads are unleavened, although some are leavened. And though I bake bread with yeast more frequently nowadays, I still find it easier and a general preference to make bread without yeast.
To begin with this recipe, we must first prepare a few components. You can have flat bread using 6 ingredients and 17 steps. Here is how you can achieve that.
The ingredients needed to make Flat bread:
- Take 2 Whole meal flour such as golden atta
- Take 1 cup plain white flour(or 1 and 1/4 if not using semolina flour
- Take 1/4 cup semolina(optional)..if not using semolina, adjust
- Prepare 6 tbspn butter like stork or flora or any thts good for cooking
- Take 1 tspnful salt
- Get Half cup oil or mixture of oil and ghee(for as needed in cookin
Learn about flatbread and how you can incorporate it into your recipes. Flat breads can be classified in two different categories: single layered and double layered. Single-layered bread is again classified in two subgroups as leavened/fermented (risen by a process of yeast. Bonus: Flatbreads work as a sandwich wrap or breakfast base, too.
Instructions to make Flat bread:
- Measure out the flours that you are using into a large enof mixing bowl.add in the salt and butter too
- Mix in the butter well to break it down into the flour completely until mixture can hold it shape briefly when squeezed btn hands..(.if mixture not holding at all its time to add in very bit of just enof cooking oil.maybe 1 tspn or so
- Now add in 3/4cup warm milk and 1/4 cup warm water bit by bit while mixing with fingers hands spoon fork or all these tools!!
- Once the mixture forms into a ball at this stage if slighty sticky knead bit by bit until well rounded dough not tough.
- (.infact use the stretching test by forming a long rod and hanging it down to the table, if its stretching out more as comes down then you got the mixture right!)
- Creat longish rod about 5 cm wide and long enof to make 12 sections..(u can just pinch iff or cut away ecces dough put on side and regather in other ball).this is if size is too big etc see pics for idea.
- Now you can cut the rod shape in half then quters then thirds so that you are getting equalish ball shapes
- How to form the ball:take each ball and flaten out then fold in the edges and tuck in while moving it round so as to make nice rounded ball..which look somthing like this.(this pic here is not actual size of ball,its for illustration only!)
- Sprinkle some flour on bowl or surface and also some on ball itself then Place the formed ball not too close together.leave to rest for 15 minutes or more.(you can also put in fridge to rest)
- The resting stage is important,so inorder the rounded balls to soften.cover with cloth or plate etc and leave aside in dry place.again,see above step(9) explanation
- …dont leave too long otherwise will be hard to work with as it may become too soft
- Now set up surface to roll out the nice soft enof doughs balls into round flat bread..u can use wooden surface specially made or can do overtemplate of round shape to guide you as you roll it out.sprinkle flower on surface. Then evenly thin out the dough into a circle to abt 1-2 mm thick.see pic of the disc shape.its ok if it doesnt form perfect circle…as long as leveling it by rolling out…you can move it around in between rolling to make easier….sprinkle flour on roller so to ease process
- Now heat the flat pan enof and add in your first flat bread (chapati its sometimes called)
- You can press the bread with a flatner or turning fork (like you use for pancakes.).until you get desired color…this step is mostly after turning the chapati over..so please adjust this..but you can move around the flat bread so evenly cooked through
- Now here is slight skill of knowing when to turn the bread..it may rise up whole or some parts(see pic) but also keep checking heat.becoz if right amount of heat evenly then its cooking well. and then can add bit of cooking oil if its too dry or just to add more color.you need to look for some nice big spots of brown forming behind the chapati so lift to check before turning
- Remove and let cool completly before store in air tight container…u can do the flexible flat bread test by bending it all direction..if it bends smoothly.and you can pull a piece off it with minimal effort..
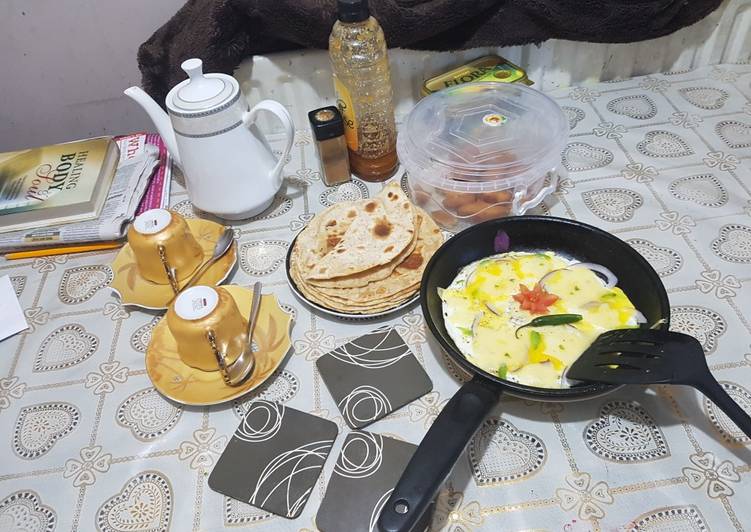
- Alhamdulillah! you got itt!well done.bismillah enjoy..this bread is flexi even in its uses…from just honey toped or even part of very healthy meal.breafast,lunch,qwik healthy snacks and dinner.some ideas are eat with delish foods like curries. Make vegs rolls,use also humus.
You'll want a pizza these flatbreads. On those days when you don't feel like dealing with a complicated sauce or dough, why not try a simple flatbread instead? Some flatbreads are leavened while others do not use a raising agent. Find flat-bread flatbread stock images in HD and millions of other royalty-free stock photos, illustrations and vectors in the Shutterstock collection. Download Flat bread stock photos at the best stock photography agency with millions of premium high quality, royalty-free stock photos, images and pictures at reasonable prices.
So that is going to wrap this up for this exceptional food flat bread recipe. Thank you very much for your time. I’m sure that you will make this at home. There’s gonna be more interesting food at home recipes coming up. Don’t forget to save this page on your browser, and share it to your loved ones, friends and colleague. Thanks again for reading. Go on get cooking!